

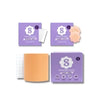
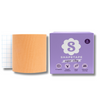
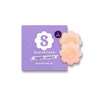
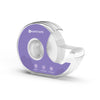
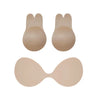


When it comes to looking your best and feeling confident in every outfit, the right support is everything. That's where boob tape comes in! Whether you're wearing a plunging V-neck dress, a backless dress or a strapless top, this simple but effective product gives you the lift and security you need. If you've ever wondered how to apply it like a pro, you've come to the right place. Let's go through the step-by-step process for getting the perfect lift with boob tape. By the end, you'll be ready to wear any outfit with complete confidence!
What is boob tape and why should you use it?
Boob tape is a skin-friendly adhesive tape designed to give support, shape and lift without the need for a bra. Unlike traditional bras, it's completely customisable and gives natural support that suits any neckline. Perfect for backless, strapless and low-cut outfits where a normal bra just won't work.
With boob tape, you no longer have to worry about bra straps poking out or uncomfortable underwiring digging into your skin. This solution isn't just comfortable; it gives you complete freedom over your look. And with Shapetape you get premium tape that's breathable, sweat-resistant and hypoallergenic – designed to last all day and all night.

Step-by-step guide to the perfect lift
Applying boob tape might seem complicated at first, but once you get the hang of it, you'll never want to go without. Follow these simple steps for a firm, flawless lift:
Step 1: prepare your skin
Before applying boob tape, make sure your skin is clean and dry. Avoid lotion, oil or powder on your chest, as they can affect the adhesion. If you have sensitive skin, test the tape on a small area first to make sure there's no allergic reaction.
Step 2: choose the right tape
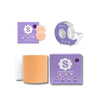
Not all boob tape is the same. Shapetape offers high-quality tape that's gentle on your skin yet strong enough for maximum lift. Our tape also comes in different skin tones, so it blends in seamlessly with yours.
Step 3: decide how much lift you want
Depending on the neckline of your outfit and the lift you want, cut the tape to the right length. You can use the full-lift method (cover the lower part of your breast and pull upwards) or side support (apply from the outside in). Experiment with different techniques to find out what works best for you.
Step 4: apply the tape carefully
Cut strips of boob tape to the length you want. Gently lift your breast and apply the tape from the bottom upwards to create lift. Smooth out any creases and make sure the tape is secure. Repeat on the other breast so they're symmetrical.
Step 5: secure the edges
Press the tape down firmly so the edges stay secure. That stops the tape coming loose or rolling up during the day. Use extra strips for more support if you need to.
Step 6: adjust and finish
Check in the mirror that you've got the lift you want, and adjust if needed. For low-cut outfits, trim away any visible edges for an invisible finish. Now you're ready to step out with confidence!
How do you remove boob tape pain-free?
Removing boob tape is just as important as applying it properly. The wrong method can cause discomfort or skin irritation. Here's how to do it safely:
-
Use oil or lotion: soak a cotton pad in baby oil or coconut oil and dab it gently onto the tape. This loosens the adhesive.
-
Let it work: wait a few minutes so the oil can dissolve the adhesive.
-
Peel slowly: gently peel the tape off from the edges. If you feel resistance, use a little more oil.
-
Moisturise afterwards: after removing the tape, apply a soothing lotion to keep your skin cared for and healthy.
With these steps, you can remove boob tape pain-free without damaging your skin.

Conclusion
Boob tape is the ultimate solution for a perfect lift without a bra. It's versatile, comfortable and suits every outfit. By following the simple steps in this guide, you can apply it with confidence and enjoy support all day.
Ready to try it yourself? Order Shapetape's premium boob tape today and feel the difference! Your perfect lift starts here.


