



Introduction
Welcome to our complete guide to applying boob tape effectively for the perfect fit and comfort. At Shapetape we understand how important confidence and support are in every outfit, and applying boob tape correctly can make all the difference. In this guide we give you step-by-step instructions and insider tips to make sure you succeed. Let's get started!
1. Understanding boob tape
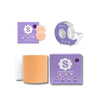
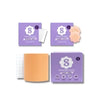
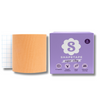
Boob tape, also known as breast tape or cleavage tape, is a specially designed adhesive tape that gives the breasts lift and support. It's often used with low-cut or backless outfits to help you get the shape you want and create a stunning cleavage. The right application technique is key to a comfortable, secure fit.
2. Choosing the right boob tape
Choosing the right boob tape is crucial for both comfort and effectiveness. Consider the following factors when choosing:
-
Quality: choose high-quality tape specially designed for breast support. Look for products made from medical-grade materials that are skin-friendly and hypoallergenic.
-
Width and length: tapes vary in width and length, so choose according to your needs. Longer tapes give you more flexibility in how you apply them.
-
Colour: boob tape comes in different colours to suit different skin tones. Choose a shade that matches your skin tone for a seamless result.

3. Preparing before you apply
Before applying boob tape, it's important to prepare your skin properly. Follow these steps for the best results:
-
Cleanse and dry: start by washing your skin with a mild soap or cleanser to remove any oils, lotions or residue. Make sure the area is completely dry before moving on to the next step.
-
Avoid moisturisers: don't apply moisturisers, oils or lotions to your chest area before applying the tape. These can weaken the adhesive.
-
Hair removal: if needed, remove any excess hair from your chest area. This step is optional but can help the tape stick better.
4. Application techniques
There are several application techniques to choose from, depending on the look and outfit you're going for. Here are two popular methods:
-
Standard application:
-
Start by cutting a strip of boob tape long enough to run from under one breast, over the top, to the other breast.
-
Lift one breast at a time, position it in the shape you want and pull the tape from the bottom upwards to create lift and support. Repeat on the other side.
-
If you want more cleavage, use extra tape to bring your breasts closer together.
-
-
Lift and push application:
-
Start by cutting two separate strips of boob tape, long enough to run from under each breast up towards your shoulder.
-
Lift one breast at a time, position it in the shape you want and attach the tape from underneath, pulling it upwards to create lift. Repeat on the other side.
-
To enhance your cleavage, cut another small strip of tape and attach it diagonally to push your breasts closer together.
-
5. Tips for comfort and long wear
To make sure your boob tape feels comfortable and lasts as long as possible, keep these tips in mind:
-
Don't overstretch: although it's important to create lift and support, take care not to stretch the tape too much, as this can cause discomfort or weaken the hold.
-
Test for sensitivity: if you have sensitive skin, it's a good idea to do a patch test before applying. Stick a small piece of tape on your skin and watch for any reaction.
-
Gentle removal: remove the tape slowly and carefully. Don't pull too fast or too hard, as this can irritate your skin. Consider using a gentle oil or adhesive remover to make removal easier.
Conclusion
Boob tape is a fantastic tool for getting the shape and support you want when wearing revealing outfits. By following our complete guide, you're now well equipped to apply boob tape effectively and confidently. When buying boob tape, it often pays to choose a boob tape bundle. Remember to choose the right tape, prepare your skin and use the right application technique to get the result you want. Enjoy the comfort, support and style!


